Sew Smarter: Introduction to Projector Sewing
Projector sewing can save time, paper, and pattern clutter by projecting digital pattern pieces directly onto fabric. Get a quick overview of how it works, what you’ll need, and the resources shared in our January guild program—plus a link to the slides.
GENERAL MEETINGGUEST SPEAKER
Kari Kechter
2/14/20262 min read
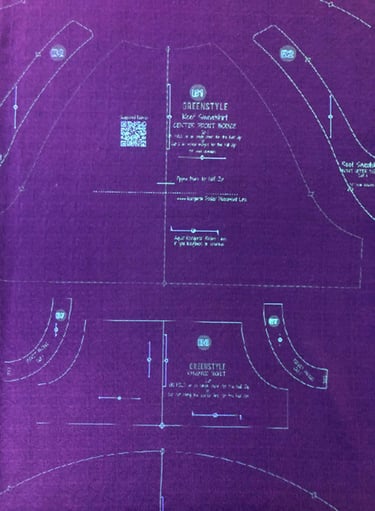
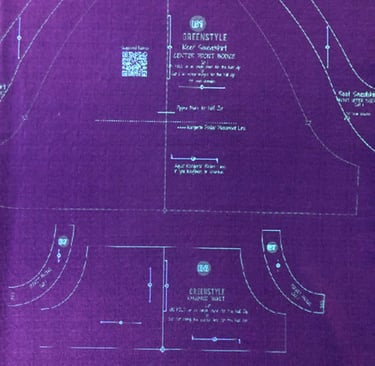
At our January meeting, we explored a tool that’s changing the way many sewists cut patterns: projector sewing (sometimes called projector cutting). Instead of printing, taping, and storing paper patterns, a digital projector displays the pattern pieces directly onto your fabric—so you can cut right along the projected lines.
What is projector sewing?
Projector sewing uses a mounted projector (often above a cutting table) to shine a pattern image down onto fabric. The pattern is opened from a digital file—typically a PDF that’s designed for projection—and the sewist aligns the image, confirms the scale, and then cuts the fabric using scissors or a rotary cutter.
Why people love it
For many sewists, the appeal is immediate:
No printing or taping: Skip the paper shuffle and get to cutting faster.
Less clutter: Patterns live digitally, not in envelopes and file boxes.
Easy size changes: Turn layers on/off and switch sizes without reprinting.
Smarter fabric placement: Projecting can make it easier to work with directional prints, border prints, and fussy cutting.
Helpful markings: Some makers use projection to place details (like pockets or pleats) right on the fabric.
The honest tradeoffs
Like any setup, projector sewing comes with a few considerations:
Upfront cost: Projectors range from budget mini models to higher-end short-throw and ultra-short-throw options.
Mounting + calibration: Getting the projector square to the cutting surface matters for accuracy.
Space and lighting: Bright rooms can wash out the image, and very large pieces may require repositioning.
Pattern files vary: A dedicated “projector file” is ideal, but not every pattern company provides one.
A simple workflow overview
If you’re curious, here’s the basic process:
Get the pattern file (ideally layered).
Open it in software that supports zoom and layers.
Set the pattern to 100% scale and confirm with a test square.
Align the image to your cutting surface.
Lay fabric flat and on grain.
Project and cut.
Resources from the program
If you’d like to review the material or share it with a sewing friend, here are the slides from the January presentation:
Projector Sewing v2 slides (PDF): https://assets.zyrosite.com/dOqyWZrqkDunW7G4/projector-sewing-v2-lovMicR3YTiHKwMO.pdf
Projector sewing isn’t the right fit for every maker, but for many it’s a “why didn’t I try this sooner?” upgrade—especially if you sew often, use PDF patterns, or want to spend less time on prep and more time at the machine.
Community
Join us to share skills and inspire creativity.
Contact
© 2024 Fort Collins Chapter of American Sewing Guild. All rights reserved.